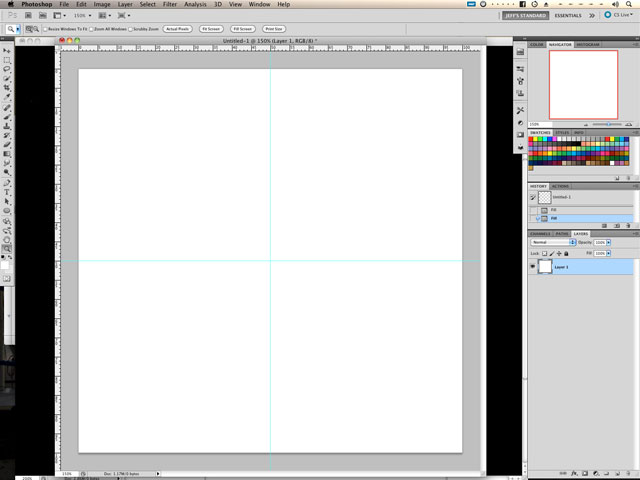
#1 In this case, I’m going to start with a simple blank document, and I chose 640×640 pixels. I’ve shown the rulers and changed them to show it as a percentage instead of pixels or inches.

#2 I started by dragging guides from the ruler to the middle (50%) both vertically and horizontally. Having the rulers set for percent makes it easy so the guides snap to 50% by default. This will allow us to center our shape very easily.
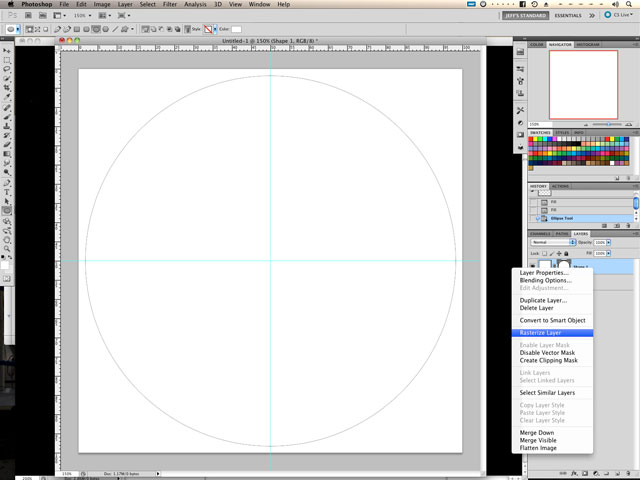
#3 So I’ve gone and made a circle, since it seems an obvious shape to create a repeating pattern on. I used the shape tool and chose a circle. I started drawing from where the guides meet, the very center of the document, and held the shift key so the shape is a perfect circle, and held the alt key, so it would draw outward from the very center. You don’t need to do that, you can draw it anywhere and just center it using the alignment palette.

#4 Making a circle or shape of any kind with the shape tool means it starts out as a vector object, and since I want to draw on it, that won’t do, so go to the layers palette and convert the circle layer to a raster object (Rasterize Layer).
#5 A white object on a white background is rather unimpressive so I made the background layer a light grey, just so we could see the circle. It’s also about this point that I realized I would have been much better off doing this as a video rather than screen-caps, but what the heck we’re well into it by now…
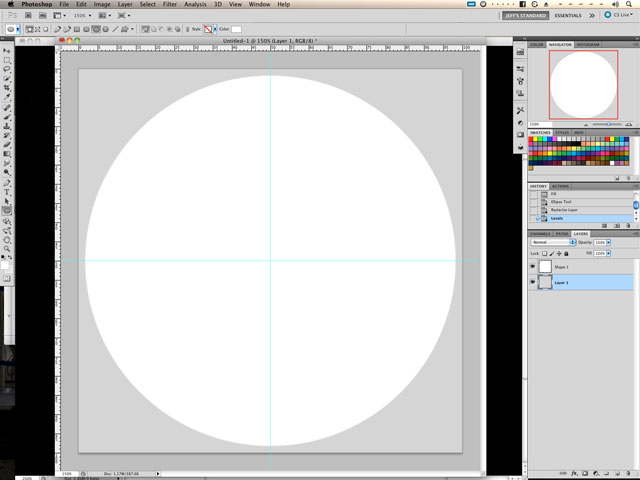
#6 Since, Smart Objects is in the title, we might as well make us a smart object! A smart object is a file within a file in Photoshop. They’re great for making one item that can be updated and updating several other versions of the same thing, and that’s what we’re going to do here. We start by selecting the layer we drew the circle on and from the layer palette (or just right clicking the layer the circle’s on) we can choose Convert to Smart Object. Go ahead and do that and you’ll see that the icon on the layer palette changes to show a new icon designating it as a Smart Object. Once you have a smart object, if you want to make a change, you need to double-click it to open up the contents of the Smart Object as a new files, then when you save it and close it, it will update the content in the main document you created it in.
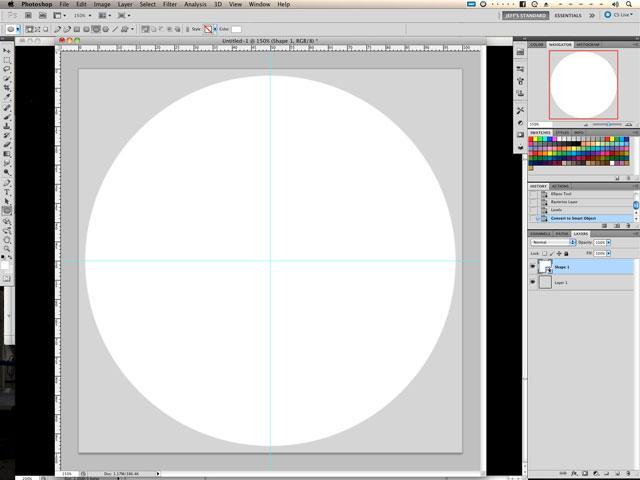
#7 I’ll explain more about that later, but for now let’s move on and see Smart Objects in action. In this example, I’m making a circle that is made up of four quarters which repeat and reflect. In order to do this, we need to duplicate our smart object three times (so there’s four total). You can just drag the Smart Object layer down to the new layer icon on the layer palette and it will make copies of our Smart Object layer. Now, if we update one, all four will have the same update. We could try that by double clicking one layer and making a change (and it would update all four) but really, since it’s four layers on top of one another, we wouldn’t see anything anyway. But, let’s make a change anyway, just to try out our Smart Object…

#8 Double click one of the Smart Object layers and you’ll see that it opens up the contents in a new Photoshop document and it’s only the circle (no background). It still has the guides so we can basically keep our drawing to one of the quarters of the circle, your choice, it won’t matter. I started with a line that will reflect on itself, but when you start you may just want to play and see what you get. The more you do of this, the more you’ll be able to predict what the result will be and what you need to do and the spaces you need to fill.
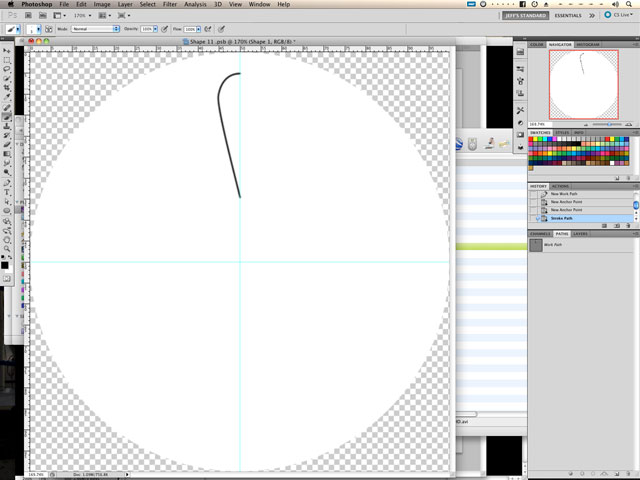
#9 When you save and close your Smart Object file that opened in front of your original document, Photoshop will do a little thinking then update the original file (with the grey background) with what we drew in the pop-up. Completely unimpressive to update one document which looks virtually identical to the first, but remember we have four copies of that layer, and now it’s time to manipulate them.
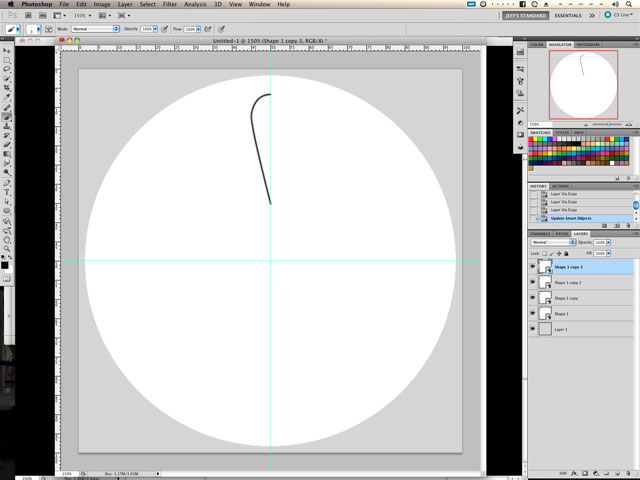
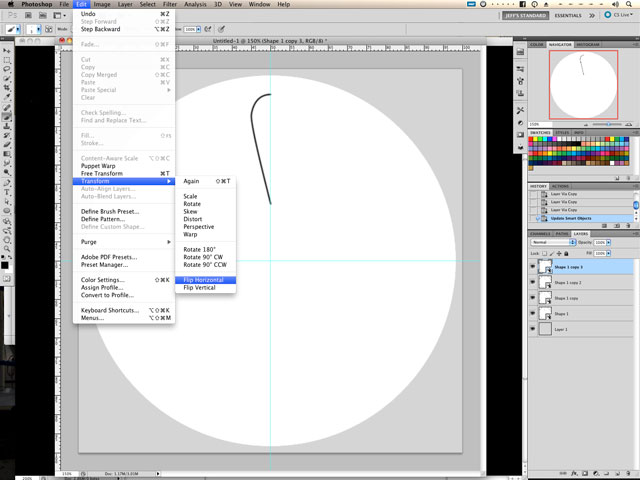
#10 With four identical quarters of our circle, we know we’ll need to do some transforming of our layers. Leave one untouched, transform one by choosing Transform>Flip Horizontal, then one Transform>Flip Horizontal then Transform>Flip Vertical, then one just Transform>Flip Vertical. This should put one quarter of the original circle into each of the quarter of the original document. We could prove it if we could see it, but we can’t not quite yet. Next step…
#11 In order to see the work we’ve done repeating the quarters, we need to switch our blend mode of the layers from Normal to Multiple. Well, we need to switch the top three to multiply, so we can see through all three down to and including the fourth. Select each layer separately and switch to multiply and you’ll see that the quarters will reveal themselves…
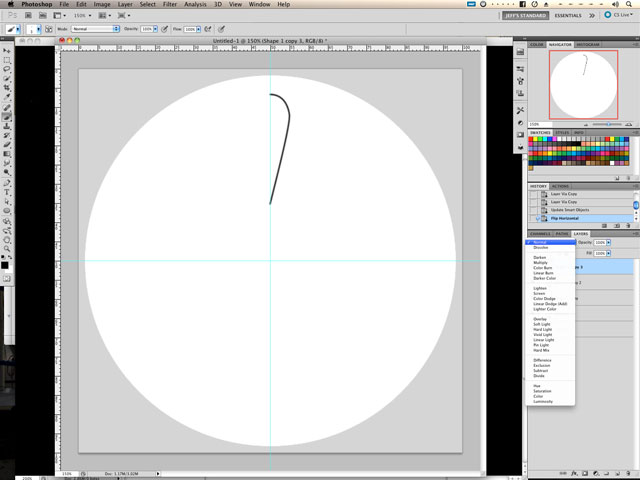
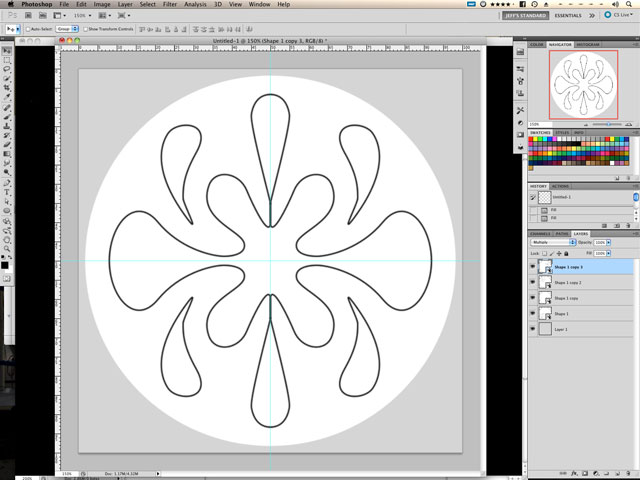
#12 In this example, it’s a pretty simple repeat and resulting pattern, but once you have a handle on that, remember that you can go back and update your Smart Object by double clicking on the layer in the layers palette and add, change or erase what you have. Try it!
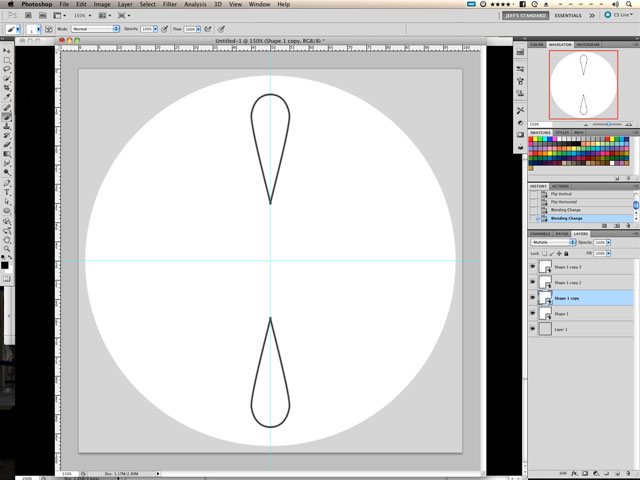
#13 Adding more lines and saving the opened file updates the main file with more lines that now repeat in all four corners. I personally can’t wait until processors and Photoshop are able to handle updating Smart Objects from within the original file, but that may take a while, especially when you consider there really aren’t any limits on size or complexity of Smart Objects. Smart Objects can be repeated over and over, duplicated, broken and repeated, nested, all kinds of fun tricks that I hope to elaborate on in future examples.
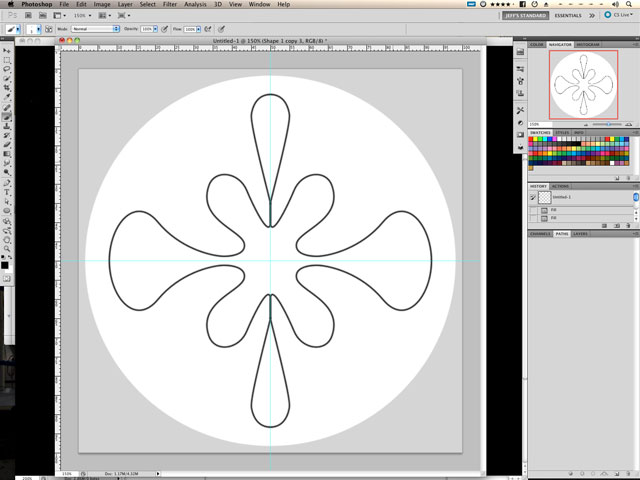
#14 Still not satisfied? Keep clicking the Smart Object layer and opening it up and making changes. You can’t break it, just keep trying to visualize what you’re creating and see how it actually ends up. The more you play with it, the more sense it will make, and hopefully the more possibilities it will suggest to you.
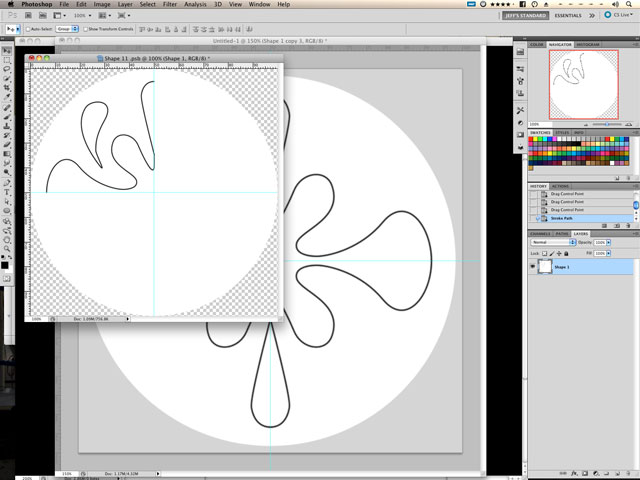
#15 So here’s my simple repeating pattern, created from a basic circle, repeated as four, and flipped and repeated onto the same space and revealed by changing the layer mode. This simple idea can be expanded into really complex patterns and shapes, but hopefully this will open the door to you trying new and interesting things for yourself!
